Let’s take a look at the SimpleTesla‘s (ST) and SimpleInterrupter‘s (SI) software capabilities.
These boards can be controlled wirelessly over Bluetooth or via fiber optic link and are highly configurable.

Download
You can download the SimpleTesla application directly from Google Play.
If you find a bug or have any suggestions – we would always appreciate your feedback.
You can contact us on TQFP forum with PM or by posting in ST’s topic.
Bluetooth
Tap the “Connect” button to open previous sessions list. Here you can search for new devices or connect the device you’ve already used.
Connecting stages:
- Connecting – establishing connection with Bluetooth module;
- Identifying – compatibility check;
- Connected – communication is established.
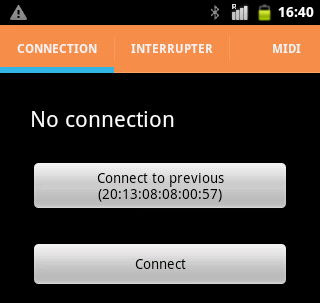
Standard password – 1234.
“Connect to previous” button connects the Android device to the last used SI/ST board.
Standard interrupter mode
In this mode application emulates the calssic bursted-mode interrupter, usually build with 555 timers.
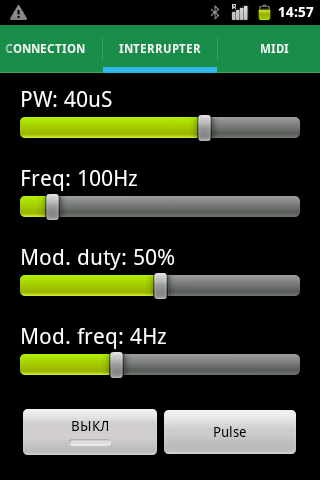
- PW stands for pulse width. You can limit it’s maximum value by changing the Max. pulse width value in the setting menu;
- Freq controls the pulses per second frequency. You can limit it’s maximum value by changing the Max. frequency value in the setting menu;
- Mod. duty controls the duty cycle of interrupter’s burst mode from 0% to 100%. For turning the burst mode off set the value to 100%;
- Mod. freq controls the frequency of interrupter’s burst mode from 1 Hz to 10 Hz.
The “Pulse” button, sends only a single pulse with PW width. Other values are ignored.
MIDI playback mode
The control program offers a variety of MIDI playback features, let’s take a looks at them:
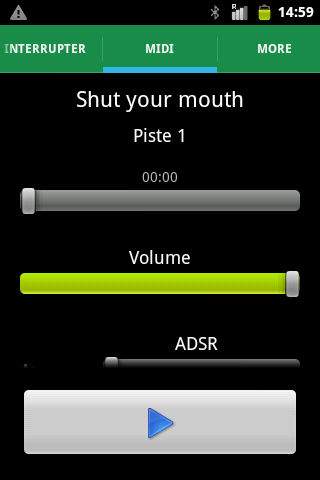
The upper string shows a previously loaded MIDI file, tapping it will open a file manager where you’ll be able to select a new file.
File manager opens an /sdcard/midi catalog by default, but you can easily choose another one.
In case there’s several tracks in your MIDI file- you can choose the exact one you need by tapping the second string.
Below there’s a time bar and volume bar. The volume bar controls the pulse’s width, it’s almost identical to the PW bar from “Interrupter” mode.
The time bar is not only an indicator, the time slider can be also controlled manually.
Dynamic pulse width
One of the cool features is the dynamic pulse width, with it you can play notes as high as 2000 Hz without any damage to your DRSSTC.
Next diagram shows dependence between the pulse’s width and other values:
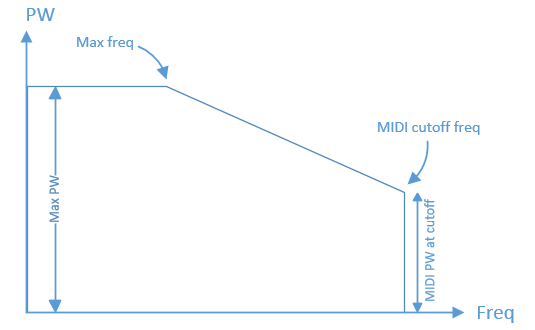
The pulse’s width also depends on general volume and played note’s volume when the “use note volume” mode is activated.
ADSR, LFO, Portamento
SI and ST are capable of providing real synthesyzer effects, such as ADSR, LFO and Portamento.
ADSR (Attack-Decay-Sustain-Release) envelope makes your Tesla coil sound more like a real instrument. By tweaking ADSR values you can make your DRSSTC sound almost like a violin.
You can find more info about ADSR on Wiki.
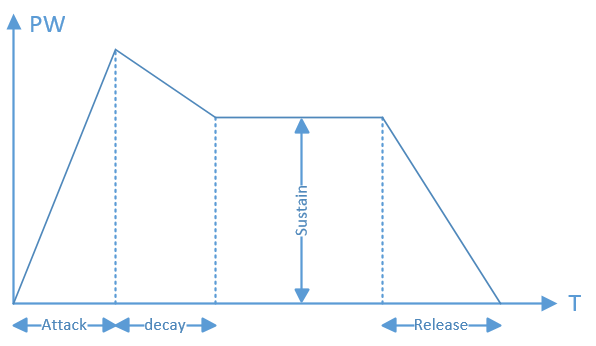
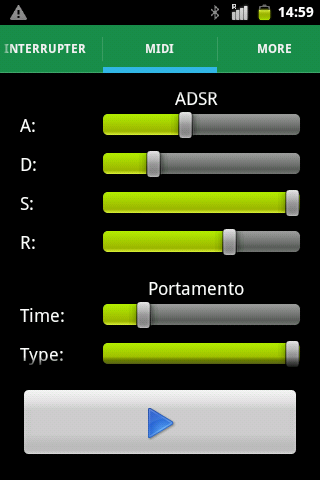
Attack, decay and release are parameters of time, while a sustain is a parameter of volume.
Portamento (Wiki) makes the note transitions softer, instead of going directly from note to note Portamento changes the output frequency smoothly.
There are two modes implemented:
- Only for one after the other notes (Type slider on the left)
- For every played note (Type slider on the right).
LFO (Low Frequency Oscillator, Wiki) is a low frequency oscillator which can modulate the main signal. It makes you coil sound like a Sci-Fi instrument.
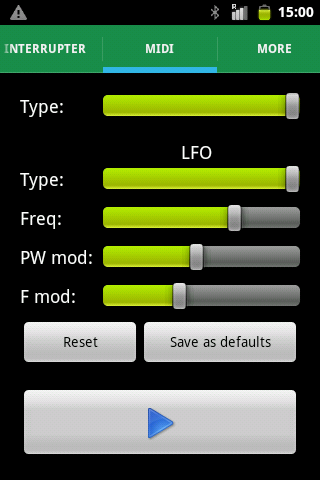
There are two types of LFO implemented:
- Square wave – Type bar on the left
- Triangle wave – Type bar on the right
You can reset the ADSR, LFO and Portamento values by tapping the “Reset” button.
“Save as defaults” button will save your values so they can be used in “MIDI over optics” mode. It would be useful in case your synthesizer doesn’t have any encoders which can be tied to your MIDI controllers.
ADSR control
ADSR can also be controlled with standard MIDI synthesizers via fiber optic link. For example, you can set your MIDI keyboard’s encoders to control MIDI controller or pass the control to your DAW.
Next controllers are supported by SI/ST:
| Controller’s number | Description |
| 12 | Volume |
| 13 | Attack |
| 14 | Decay |
| 15 | Sustain |
| 16 | Release |
| 17 | Portamento |
| 18 | Portamento type (0 – legato, 1 – always) |
| 19 | Lfo shape (0 – square, 1 – triangle) |
| 20 | Lfo freq |
| 21 | Lfo pw mod |
| 22 | Lfo freq mod |
Input modes
You can choose between several input modes for your interrupter:
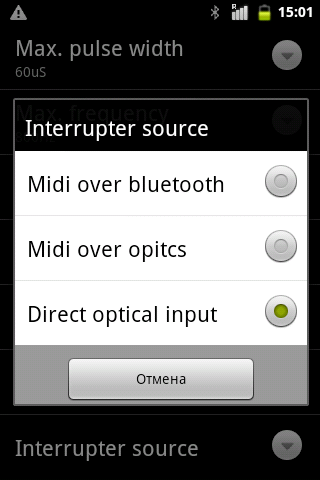
“Direct optical input” is limited by Max. pulse width and Max. frequency values.
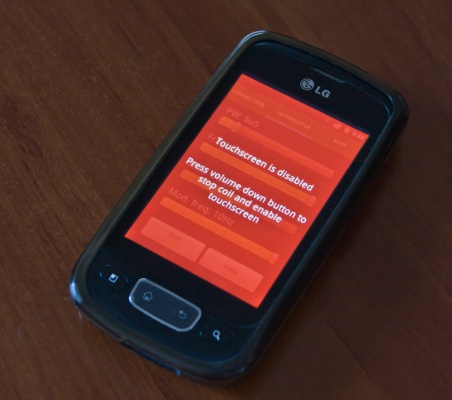
Touchscreen lockdown
Some Android devices happened to have too sensitive touch screens, which are not functioning properly under Tesla coil’s EM field. Here’s the list of already tested devices.
In case there’s any trouble with your touchscreen’s behavior- turn on the touchscreen lockdown option.
Firmware update
You can always get the last available firmware by activating your internet connection and selecting the “update firmware” menu in a “More” tab.
Keep your connections steady and don’t turn off your Android device or SI/ST. Lost connection won’t hurt your current firmware, just reboot your SI/ST and try againg.
Updates are usually announced on ST’s project page.
Overcurrent detection module
*Available only for SimpleTesla
You can set your overcurrent protection values in an “OCD settings” menu. The values are “Current limit”, “OCD burden” and “OCD transformer ratio”.
Default burden resistors are 3.3 Ohm for ST2 and 1.5 Ohm for ST3. Default current transformers(CTs) are 1000 turns for ST2 and 200 turns for ST3.
ST2 users should make their own CT by cascading two 33 turns transformers in series, while in ST3 CT is already mounted on a PCB.
A zero Current limit value tuns the OCD module off.
Default settings
You can roll back to factory settings by rebooting with shorted Func and +3.3V vias.
It’ll reset all the settings to their default state, reset the password to 1234 and reconfigure the BT module.
Leave a Reply